


In this article, I am giving away a social media design template for the Facebook fan page 2018 and demonstrating how to use it.
Scroll down for more in-depth info! I hope you find this useful.
Over the past few years, I have been creating quite a lot of design for social media. In order to ease my workflow, I’ve developed this Facebook fan page design kit, which is a series of templates allowing me to create and preview my design offline before it is uploaded to the network. This enables me to correctly position and prepare my artwork seamlessly and stress-free.
Today I share this with you.
GET THE FREE BLANK FACEBOOK FAN PAGE UI DEMO TEMPLATE

Download here FREE

Need help? Read the download Instructions here.
GET THE FREE EXERCISE FILES
Get the demo files that I will be using to showcase how the template works. FREE
 Download approx 34MB |
 Download approx 45MB |
HOW TO USE THE TEMPLATES
Once downloaded be sure to extract the files first using the correct program.
With the FACEBOOK SOCIAL MEDIA DESIGN KIT – 2018 file uncompressed you will find the files inside.
In here you will find a series of template files to compose your profile image, profile header image and posts.
Also, you will find the Facebook UI demo document which you will paste your artwork files into, to preview.
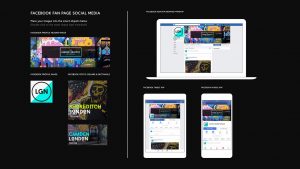
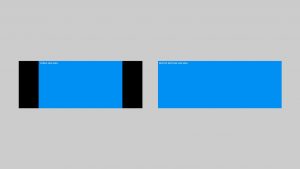
With the ‘4 – FB_UI_DEMO_2018.psd’ open you will see a blank document ready to paste in your own artwork. Here you will see Facebooks’s current UI compositions for 2018 across devices from desktop to mobile.
On the left, you will see the social media elements: The profile image, profile header image and posts.
TAKE NOTE: These are smart objects. Whatever you edit in these smart objects will also appear in the device UI to the right.
Now in the layers panel, you will see that this has been composed to make it easy for you to edit.
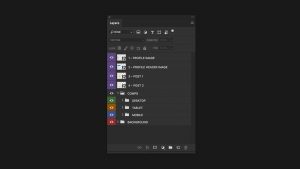
All purple smart object layers are what you want to edit.
You don’t really need to go into the layer folders below to edit the images.
Now if you go into the EXERCISE FILES folder and open the ‘4 – FB_UI_DEMO_2018_EXERCISE.psd’ you will see an example of a design across the devices.
On the left, you will see the social media elements and on the right, you can see how they fit into the Facebook UI across devices.
Now I’ll explain how to preview your social media elements in the blank document.
Let’s start with the profile image.
PROCESS KEY:
To use the templates I would advise that you:
STEP 1 – First design your artwork using the blank template documents.
STEP 2 – Once complete paste the artwork into the Facebook Fan Page UI demo template to preview the artwork.
DESIGN THE PROFILE IMAGE – STEP 1
Before previewing your profile image you will want to design it.
First you will want to open ‘1 – FB PROFILE IMAGE.psd’ in the ‘DESIGN KIT’ folder.
Now currently on Facebook, profile images will feature in both square and circle format.
In this document, you will see a grouped folder with a circle mask to allow you to correctly preview your circle profile image as it may appear on Facebook.
Currently, the mask is disabled, to allow you to see it in square format. If you want to see the circle crop, right click on the layer mask and click ‘enable’.
Use this document to place in your images and text to compose your profile image.
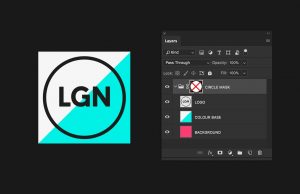
If I come to the EXERCISE FILES folder, and open ‘1 – FB PROFILE IMAGE_EXERCISE.psd’. Here is a logo profile image design I have prepared earlier.
Notice the layers are contained in the masked folder. If I right click and enable the layer mask, you can see how it will feature as a circle when cropped.
PREVIEW THE PROFILE IMAGE – STEP 2
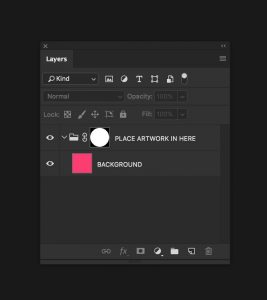
In the blank UI demo template, in the layers panel, if you double click on the top ‘1 – PROFILE IMAGE’ smart object layer you will open this in a new tab.
Here you can see that this is similar to the profile image document I just demonstrated which I advise you create your profile image artwork in first.
So in the profile image file I composed my artwork in, for my example this logo, I’ll either copy it and then paste it into the blank smart object layer in the demo template or drag the layers in.
Make sure the layers are in the in the masked folder.
Once happy I’ll close this.
Back in the UI demo template you will now see that it’s updated across all devices to preview.
If required, go back to the profile image template and make any necessary tweaks. And repeat the previous process to paste back into the UI demo until you are happy.
Once happy right click on the ‘CIRCLE MASK’ folder, disable the layer mask, and you will see the full square image. Now you can save this off and upload to Facebook and it should fit perfectly.
DESIGN THE PROFILE HEADER IMAGE – STEP 1
Before previewing your profile header image you will want to design it.
First you will want to open ‘2 – FB PROFILE HEADER.psd’ in the blank template folder.
TAKE NOTE: In the layers panel you will see there are a series of safe areas. These have been placed here for you to accurately compose your artwork.
Here you can see the safe areas for Desktop and Mobile by toggling the visibility of the folders.
Use this document to place in your images and text to compose your profile image accurately.
If you are planning to put text or graphics that will be legible on every device, make sure your composition fits within the ‘MOBILE’ safe zone.
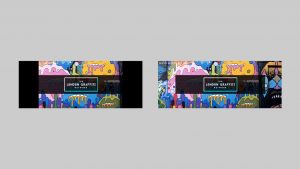
If I come to the DEMO FILES folder, and open ‘2 – FB PROFILE HEADER_EXERCISE.psd’. Here is a profile header image design I have prepared earlier.
(Toggle the safe areas to see how it has been composed)
PREVIEW THE PROFILE HEADER IMAGE – STEP 2
In the blank UI demo template, in the layers panel, if you double click on the ‘2 – PROFILE HEADER IMAGE’ smart object layer you will open this in a new tab.
Here you can see that this is similar to the profile header document I just demonstrated which you can create your profile header image artwork in.
So if I now come to the DEMO FILES folder, in here I will see the artwork I have prepared earlier for the profile header image.
Once open I’ll either copy it and then paste it into the blank smart object layer in the demo template or drag the layers in.
Once happy I’ll close this.
Back in the UI demo template document, you will now see that it’s updated across all devices.
TAKE NOTE: Notice how the design looks different across UI devices.
By using the safe area guides in the template the design has been made to fit the smallest UI correctly but also works well across all the others.
If required, go back to the profile header image template and make any necessary tweaks and repeat the previous process until you are happy.
Once happy make sure the visibility is off for each safe area, save and upload to Facebook and it should fit perfectly.
DESIGN THE POSTS – STEP 1
Before previewing your post images you will want to design them.
Included in this pack are 2 examples of how you can post images on Facebook using the rectangle post or a square post.
First, you will want to open either ‘3 – FB POST 1.psd’ or ‘3 – FB POST 2.psd’ in the blank template folder.
Use these documents to place in your images and text to compose your post image accurately.
If I come to the DEMO FILES folder, and open either ‘3 – FB POST 1.psd’ or ‘3 – FB POST 2.psd’ in the layers panel you will see an example of a post I have prepared earlier.
PREVIEW THE POSTS – STEP 2
In the blank UI demo template, in the layers panel, if you double click on either ‘3 – POST 1’ or ‘4 – POST 2’ smart object layer you will open this in a new tab.
Here you can see that these are similar to the post documents I just demonstrated which you can create your post artwork in.
So if I now come back to the DEMO FILES folder, here I will see the artwork I have prepared earlier for the post images.
Once open I’ll either copy them and then paste them into the blank smart object layers in the demo template or drag the layers in accordingly.
Once happy I’ll close them.
Back in the demo template document, you will see the post update across all devices.
(only the square post is included in the demo UI devices)
If required, go back to the post image templates and make any necessary tweaks and repeat the previous process until you are happy.
Once happy save and upload to Facebook and it should fit perfectly.
So that’s my social media design kit for Facebook 2018. I hope you find it as useful as I do.
Enjoy and good luck!
REFERENCES
Find out more here:
The ultimate guide to social media graphic sizes & dimensions
CLICK HERE
The Ultimate Guide for Social Media Image Dimensions For 2018 – with Infographic